Broadcast LIVE with CLUBCASTING

Teach your radio station new tricks
CLUBCASTING™ makes broadcasting LIVE easy. This tutorial is broken down into 4 sections.
- Configure Streamer/DJ Accounts (users/passwords) in your CLUBCASTING dashboard
- Note your IceCast server information
- Download, install and configure BUTT (IceCast streaming client)
- GO LIVE!
Some DJ software and controllers have the ability to connect directly to an IceCast stream built in. If yours does, you can skip the BUTT section. If not, download BUTT – Broadcast Using This Tool – a free, cross-platform utility that you can install on Mac, Windows and Linux. You’ll need to login to your dashboard and create at least one Streamer/DJ account to get started. Let’s go!
Configure Streamer/DJ Accounts
Step 1: Login to your dashboard and click on Streamer/DJ Accounts from the left navigation menu.
Step 2: Click “+ Add Streamer”

Step 3: Create username (all one-word, lowercase)
Step 4: Create a secure password
Step 5: Enter display name (DJ Name or Show Title – this can be overridden by external source like BUTT)
Step 6: Hit “Save Changes”

IceCast server information
After saving changes, you’ll be redirected back to the previous page where you need to make a note of the IceCast server settings specific to your station. Replace the settings in the screen capture below, with your actual settings where indicated.

If your controller or software supports connecting directly to an IceCast server, you’re ready to enter your Streamer/DJ account credentials.
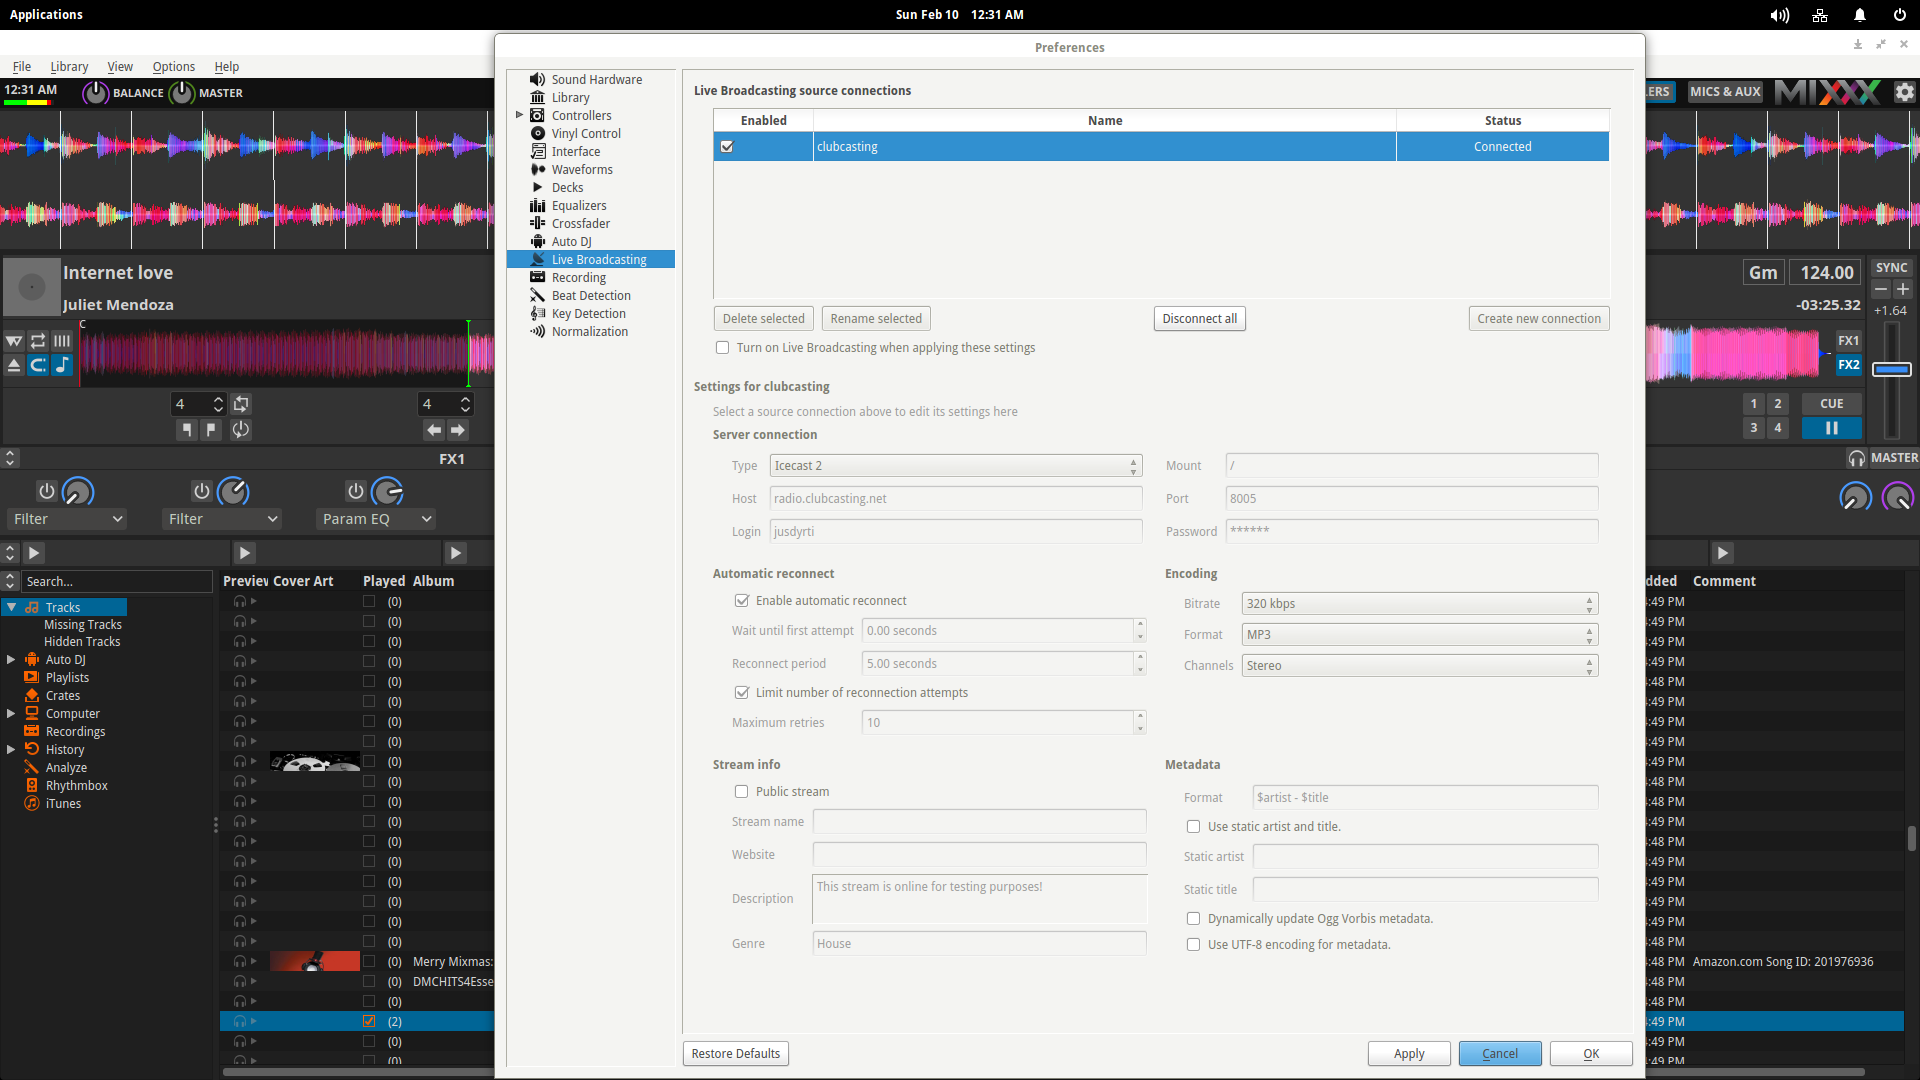
If not, continue reading to download and configure BUTT.

Pro tips for broadcasting LIVE:
- Take the Record Output of your mixer or controller to the input of your laptop or external sound card. This way, you can pump the master without affecting the mix. BUT, watch your levels on the individual channels.
- You’ve probably heard the phrase, “If you’re not red-lining, you’re not HEADLINING.” That definitely doesn’t apply to recording or broadcasting live. Pay attention to your levels. DON’T red line. You can fix many things in post-prod; clipping isn’t one of them. It sets the pros apart from amateurs.
- Make sure your mixer or controller is in STEREO MODE. It’s easy to bump the switch into the mono position. Always double-check.
Download, Install and Configure BUTT to Broadcast LIVE
Download, install and configure BUTT to connect to your radio station and broadcast LIVE. BUTT is an opensource, free, cross-platform utility that allows you to connect to an IceCast (or ShoutCast) server. Depending on whether you are using Linux, Mac or Windows and what kind of hardware you have will determine your audio path, but the principles are the same.
Step 1: Download, install, and open BUTT

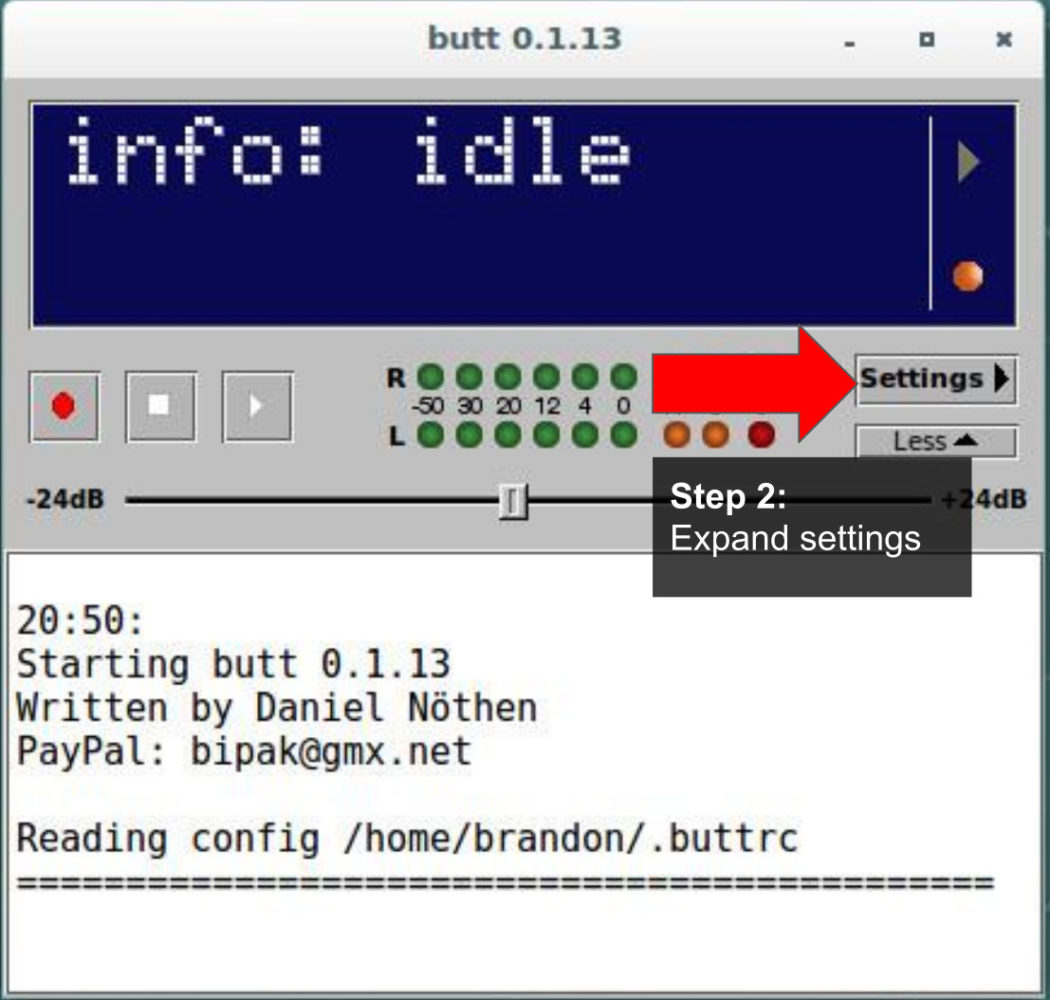
Step 2: Expand settings
Step 3: You should already be on the “Main” tab, if not choose it.

Step 4: Choose your Audio Device (sound card) This could be an external sound card depending on your setup. You may need to experiment with this setting this first time, until you see audio input on the level indicators to the left.

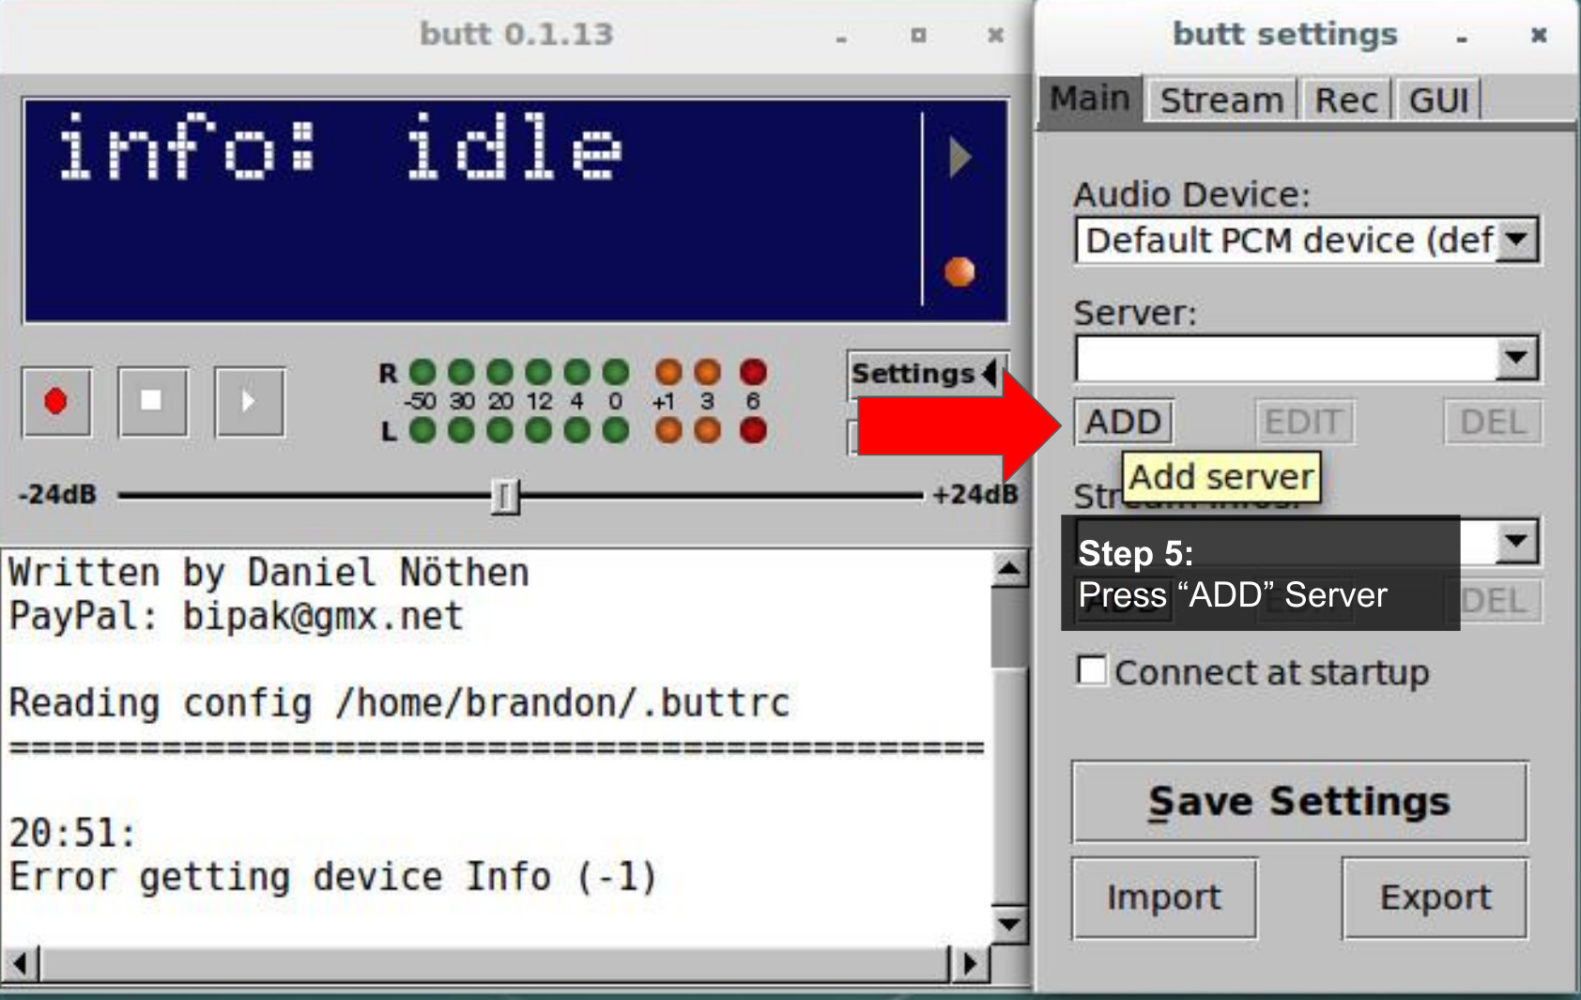
Step 5: Press “ADD” Server button
Step 6: Name your connection (we recommend CLUBCASTING for easy reference later)
then enter server and Streamer/DJ Account info.

- Name your connection
- Server type: IceCast
- Address: replace “radio.clubcasting.net” with your server address listed in your dashboard
- Port: 8005 (or port listed in your dashboard)
- Password: user password you created in Streamer/DJ Accounts
- IceCast mountpoint: /
- IceCast user: user you created in Streamer/DJ Accounts
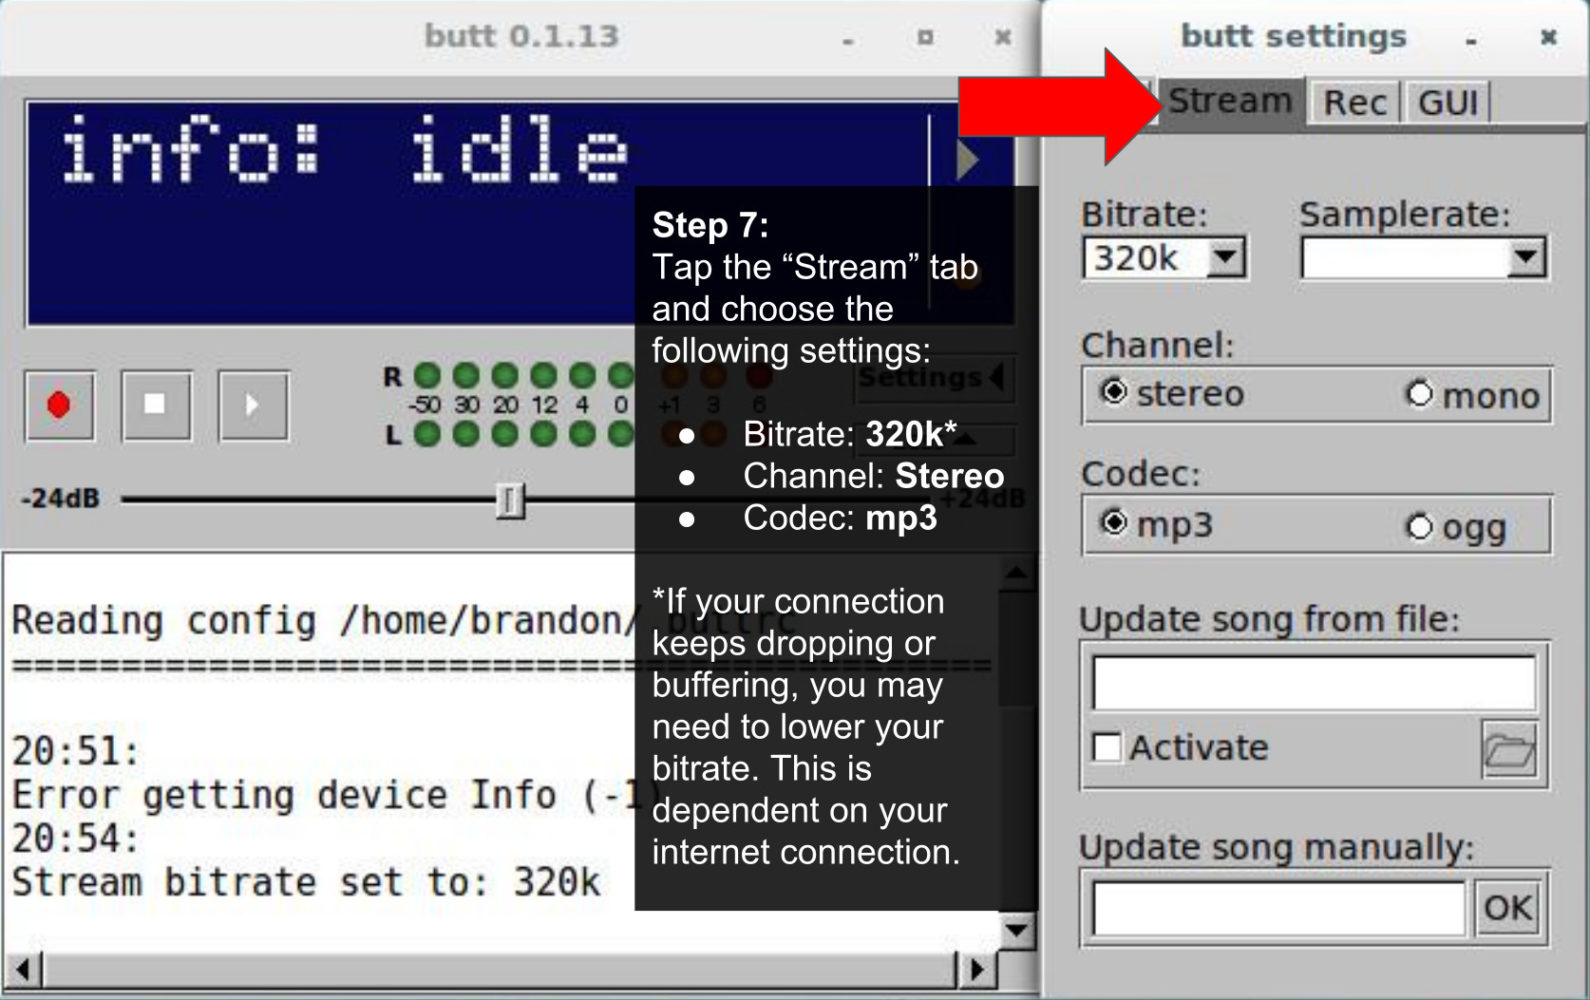
Step 7: Tap the “Stream” tab and choose the following settings:
- Bitrate: 320k*
- Channel: Stereo
- Codec: mp3
*If your connection keeps dropping or buffering, you may need to lower your bitrate. This is dependent on your internet connection.
Step 8: Hit “Play” button to GO LIVE!
NOTE: It takes a few seconds for the connection to be established. This will interrupt all on air content while connected.
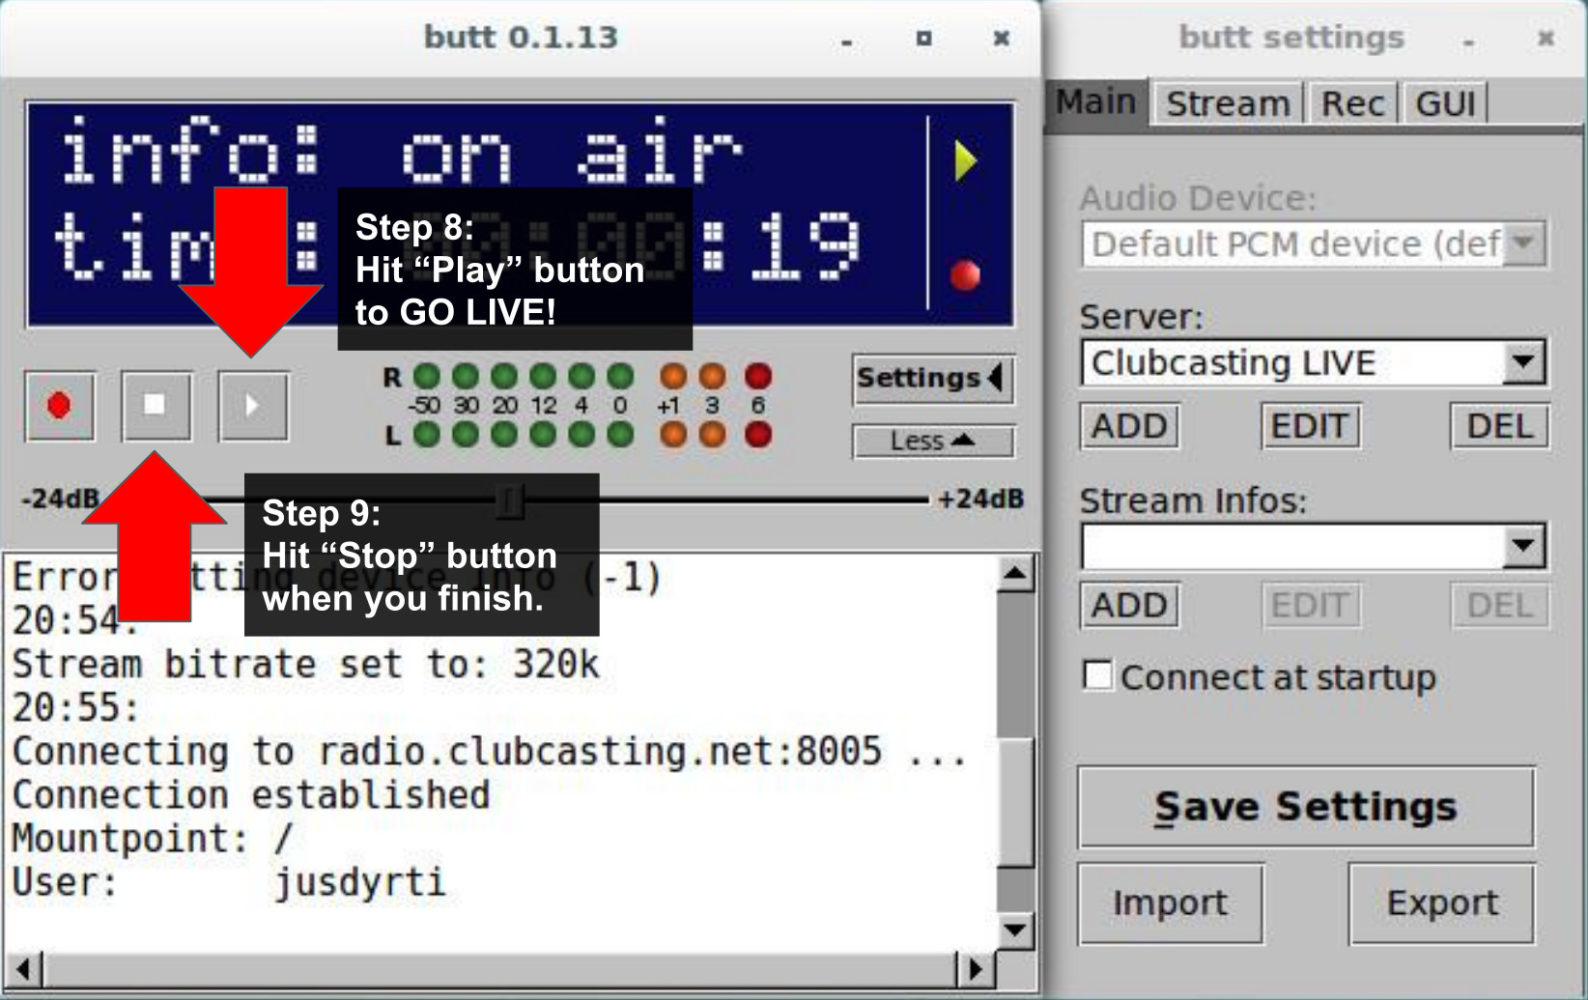
Step 9: Hit “Stop” button to disconnect when you finish. When you disconnect, the Auto DJ resumes where it left off before you went LIVE.
Best practices to prevent unwanted interruptions on the air. Temporarily Disable (or Re-enable) Streamer/DJ Accounts
Each connection interrupts what’s on the air with a LIVE feed from the connected DJ account. For this reason, we recommend limiting the number of Streamer/DJ accounts to 1 or 2 and disabling the accounts between use, to prevent accidental (or intentional ?) interruption by DJs logging in unexpectedly.
Step 1: Login to your dashboard and choose Streamer/DJ Accounts from the left navigation menu.
Step 2: Click “Edit” corresponding to the account you’d like to disable or re-enable.

Step 3: In the next window, simply tick “No” to disable or “Yes” to re-enable in the “Account is Active” section
Step 4: Hit the “Save Changes” button.

Pro tips for broadcasting LIVE:
- Take the Record Output of your mixer or controller to the input of your laptop or external sound card. This way, you can pump the master without affecting the mix. BUT, watch your levels on the individual channels.
- You’ve probably heard the phrase, “If you’re not red-lining, you’re not HEADLINING.” That definitely doesn’t apply to recording or broadcasting live. Pay attention to your levels. DON’T red line. You can fix many things in post-prod; clipping isn’t one of them. It sets the pros apart from amateurs.
- Make sure your mixer or controller is in STEREO MODE. It’s easy to bump the switch into the mono position. Always double-check.